01: Installing the JDK
Estimated reading time: 7 minutes
Estimated time to complete: 15 minutes (plus download time)
In this course, we’ll be using Java. Java is a software platform; among other things, it consists of:
- a language specification, describing the code you’ll write in
.javafiles - a compiler (usually
javac) which transforms the human-readable code in.javafiles into machine-executable bytecode (stored in.classfiles, which themselves are sometimes stored in.jarfiles) - the platform (sometimes called the “standard library” or “API”, http://docs.oracle.com/javase/8/docs/api/), a library of useful pre-defined classes
- a virtual machine (a “JVM”), a program that allows a computer to execute a Java
.classfile as a program
All of these items come in different versions (for example, Wikipedia’s list of Java virtual machines contains over 50 different JVMs).
To help eliminate problems due to incompatible versions of different pieces of the Java software platform, we’ll all be using the latest version of Oracle’s Java8 SE (“Standard Edition”) SDK (“Software Development Kit”), also sometimes known as the “Java Development Kit” (or “JDK”). This lab will walk you through installing the SDK and verifying that it’s installed correctly on your computer.
Overview
In this lab, you’ll download and install the latest version of the Java8 SE SDK. Then, you’ll verify it’s installed. Finally, you’ll take a screenshot to submit as proof you completed the lab.
If you use a UMass IT Computer Classroom rather than your own computer, the latest Java8 SDK should be pre-installed on all machines. You won’t need to download or install the SDK yourself, but you’ll still need to submit this lab, showing you have access to a correctly-configured SDK. See “Submitting the lab” below for directions.
Goals
- Install a working Java8 SE SDK (or show you have access to one).
- Learn to take screenshots.
- Learn to submit files through Moodle.
Downloading the SDK
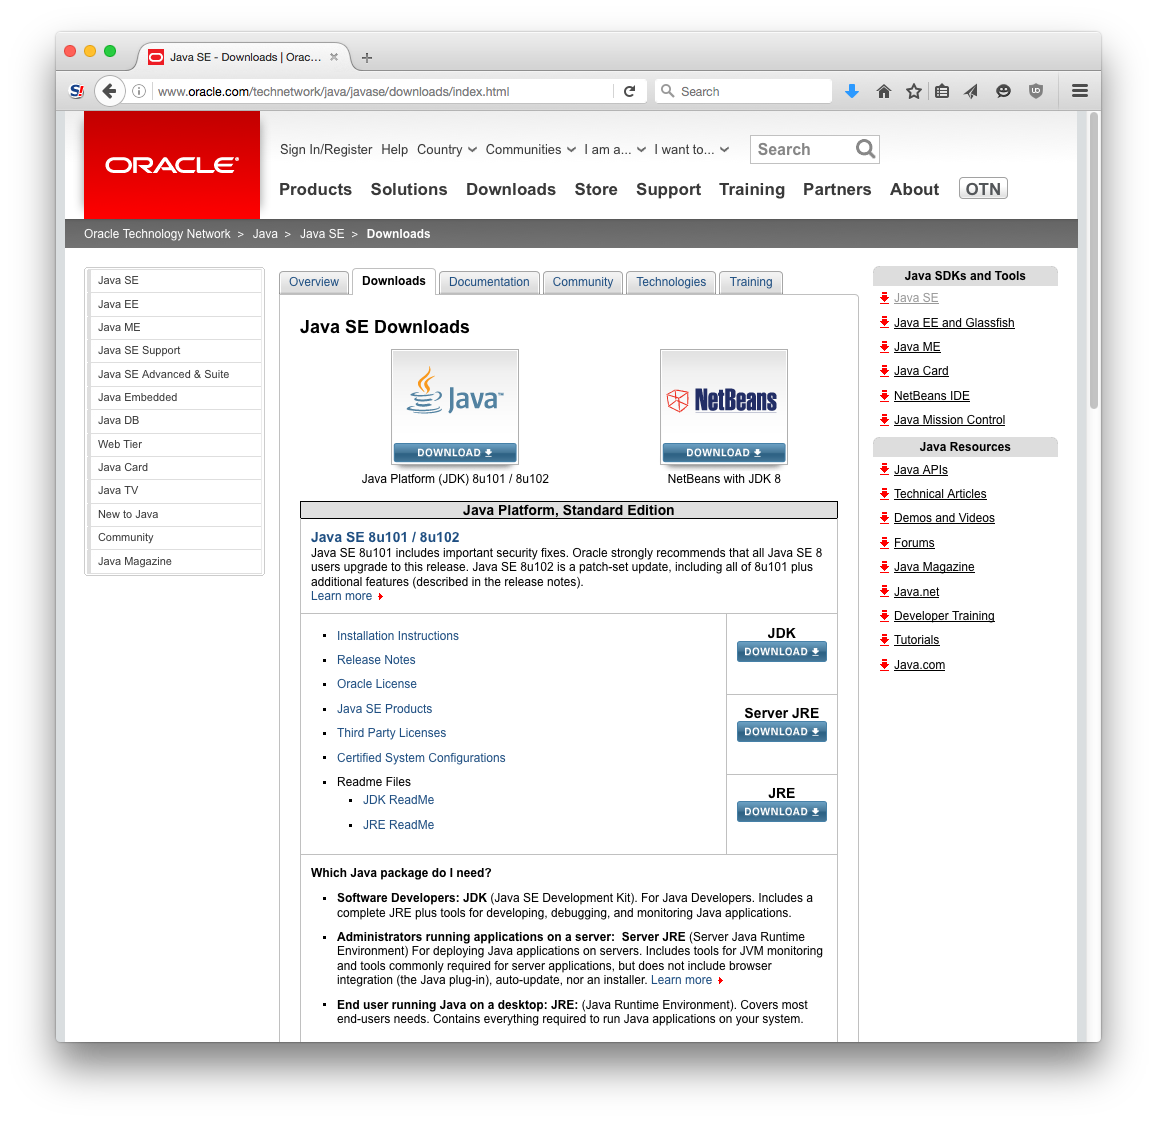
Go to Oracle’s Technology Network website (http://java.oracle.com/), navigate to the Java section, then find the Java SE downloads section. (When I wrote this lab, the direct link was at: http://www.oracle.com/technetwork/java/javase/downloads/index.html; if this link does not work, please contact me to update it.)
You should arrive at a page that looks like the following:
Click the download button for the JDK, and you should arrive at a page listing the various downloads available:
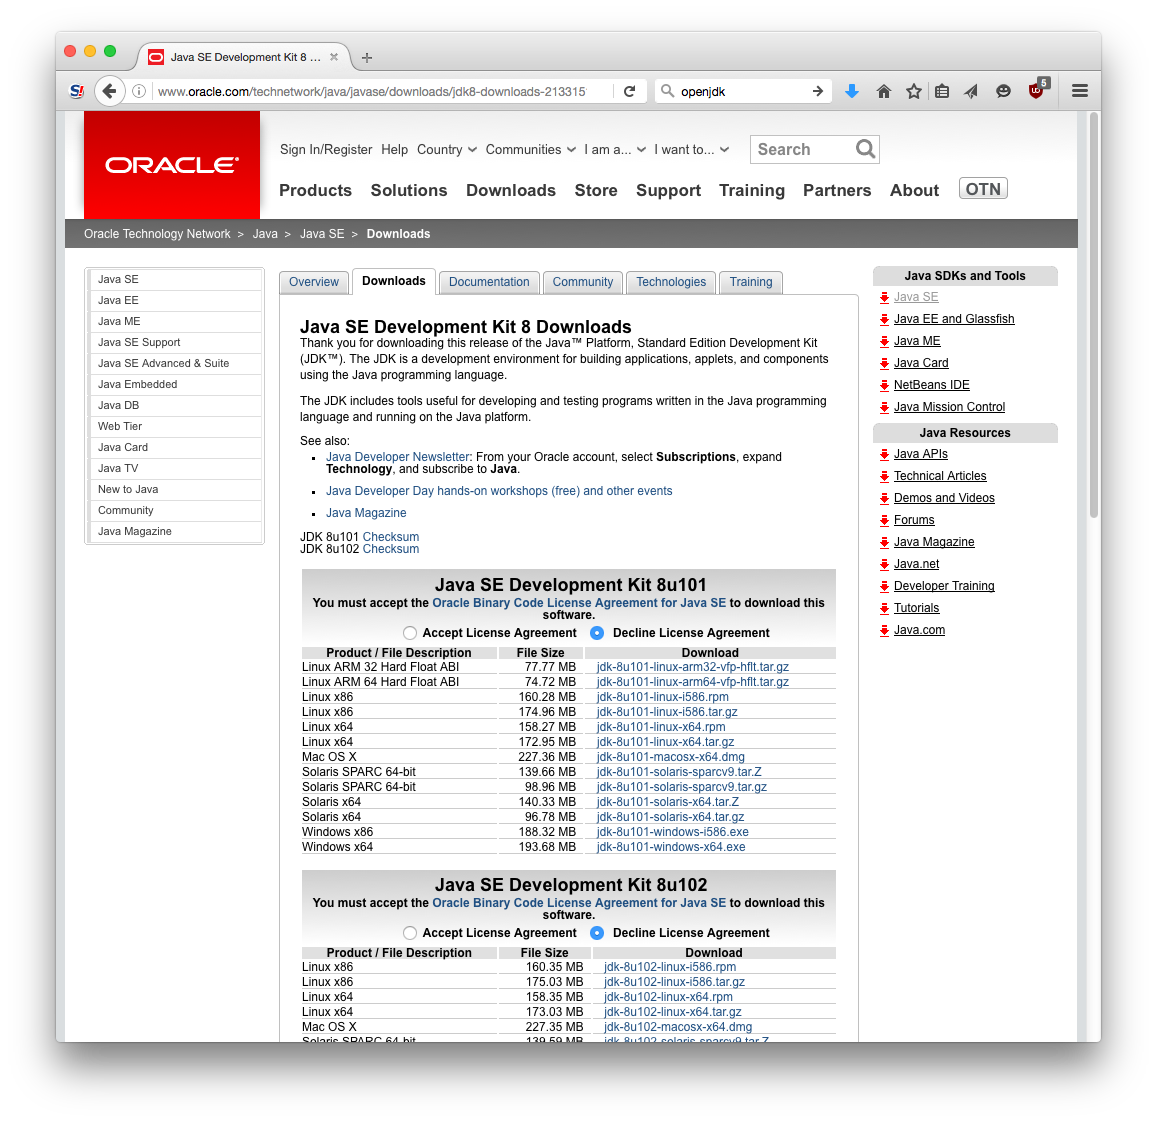
Choose the correct version for your operating system. For Mac OS X, there is only one choice. For Windows on a relatively new machine, you almost certainly want the “x64” version. (For Linux, you will probably want to install your distribution’s version of the OpenJDK. Check your specific Linux distribution’s package manager for the preferred Java8 SDK on your distribution.) Accept the license agreement using the small radio button, then click the download link.
The key point here is that you are downloading the Java8 SE SDK (that is, the JDK) – you are not downloading Java EE or ME, and you are not downloading the “Java Runtime Environment” (“JRE”).
You should be downloading the latest version, which at the time of this writing is the Java SE Development Kit 8u121.
Installing the SDK
Locate the downloaded file, which will be stored with in your web browser’s standard download location.
Under Windows, it’s a self-extracting executable file (.exe) that runs the installer; under OS X, it’s an installer package (.pkg) inside of a disk image (.dmg). Either way, double-click the file. (Your web browser might also have prompted you to run the downloaded file, which is fine, too.)
Once you run the installer, you should be guided through a series of dialog boxes. You should choose a default (standard) install: the JDK for all users.
Verifying the installation
If everything appears to have gone well, you should have the Java8 SE SDK installed on your system. To verify:
-
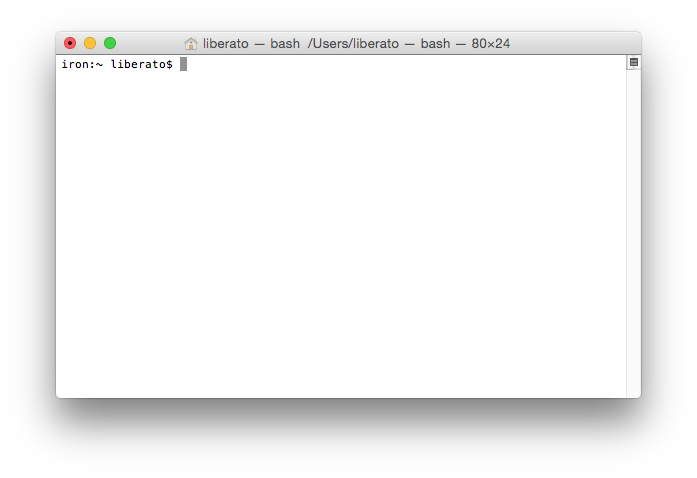
OS X: Open the “Terminal” app, which is usually located inside the “Utilities” folder in the “Applications” folder (or just type “terminal” into the Spotlight search). It should look something like:
Type
java -versionand press return. Then typejavac -versionand press return. You should see something like: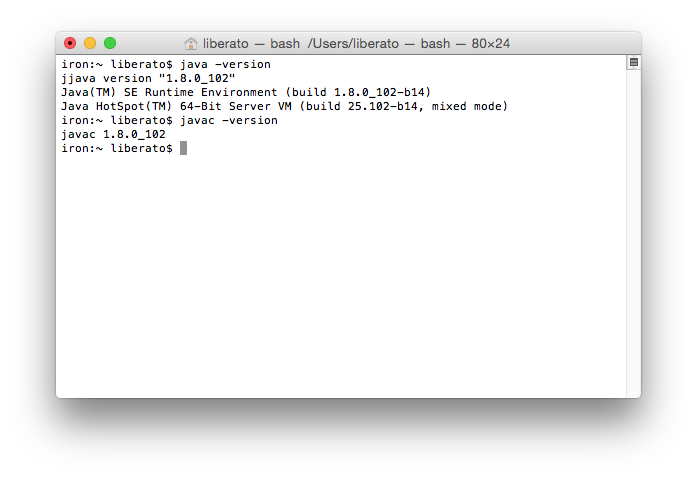
Take a screenshot of this window by pressing
Command-Shift-4(the cursor should change to a crosshair with coordinates), then pressing space (the cursor will change to a camera), then clicking the window. A PNG file named something likeScreen Shot 2016-06-27 at 13.42.49(but with the current date and time) will be created on your desktop. This file is what you’ll submit to show you’ve completed the lab. -
Windows: Open the Windows (File) Explorer. One way to do this is to open the Start menu and type
explorer, then choose the appropriate option. Navigate to where you installed the JDK (by default: in theC:drive, in theProgram Filesfolder, in theJavafolder). You should see a window that looks something like: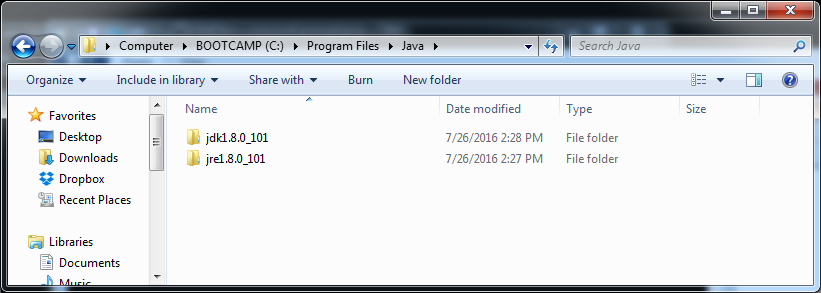
You’re looking to see that a folder staring with
jdk1.8is in this directory. It’s OK if there’s also a JRE installed (in a folder starting withjre, as shown here), but you must also have the JDK installed.Take a screenshot of this window by making sure it’s the topmost window, then pressing
ALT-PrintScreen. ThePrintScreenkey is usually on the top row of keys:
(image from https://en.wikipedia.org/wiki/Print_screen#/media/File:KeyboardWithPrintScreenRinged.svg, licensed under CC-BY-SA 3.0.)
This copies the screenshot to the clipboard. Now open “Paint” by again using the Start menu, and paste the image into a blank file. Depending upon what version of Windows you’re using, there will either be a
Pastebutton, or aPastemenu item under theEditmenu, or you can just pressControl-V. Then save the image to a file.Windows users should note that there are many different ways to take screenshots in Windows, depending upon the exact version of Windows you have. Google might help you here, and remember, collaboration is fine on this lab. Ask a friend or classmate for help!
If you get desperate, you can also use a smartphone to snap a picture of the screen. Send it to yourself (email, or Dropbox, or whatever you like) to end up with a submittable file.
Submitting the lab
Use the course Gradescope site to submit the screenshot you created.
If you choose to use the IT Computer Classrooms, you can either submit a screenshot as above, or just a simple .txt file that states “I am using the computer classrooms.” to receive full credit for this lab.